Showing posts with label Tutorial. Show all posts

How to Easily Resize a Shirt or Jacket | Tutorial

How to Resize a Shirt
Jacket and jeans: thredUP | Nursing top

In case you guys didn't know, I'm in love with thredUP. It's basically an online thrift store. I love scoring designer pieces for a fraction of the retail price.

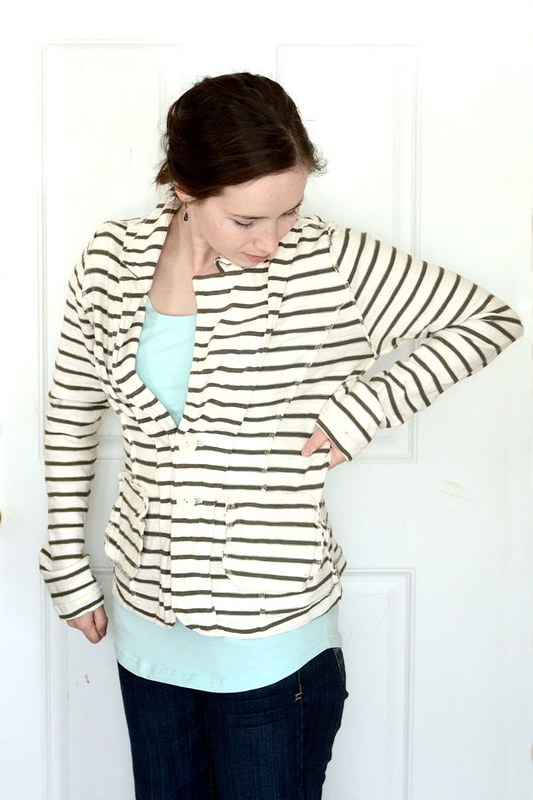
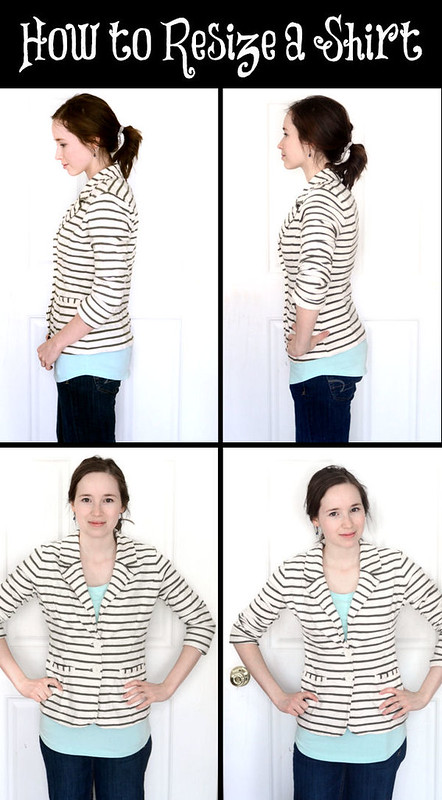
One of the problems with buying anything online is the risk of getting the right fit. I'm sure this jacket was meant to fit a little looser, but I prefer a more snug fit since I'm on the shorter side (5'2") and I don't want to be swallowed by my clothing.

It's super easy to take in a knit jacket or shirt. Let me show you how!


How to Resize a Shirt

Start by putting your shirt on inside out. Grab the excess fabric with your hands and place pins all along the sides of the shirt.


How to Resize a Shirt
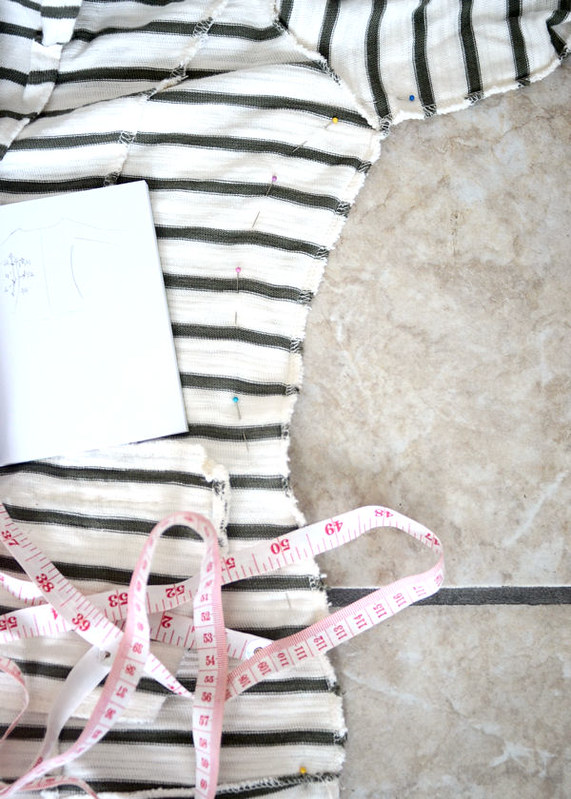
Carefully take off your shirt and lay it out on the floor or (if you're super cool) your work table.
Measure how much you need to take in at different points on the shirt and write it down (for example, at 3 inches from the armpit, how much do you need to take it in? How about at 5 inches, etc.?). I find it helpful to draw a diagram.
Remove the pins, make sure the shirt is laying flat and even, and replace the pins at the measurements that you wrote down. You can also draw a line along the pins to help you sew evenly.


How to Resize a Shirt
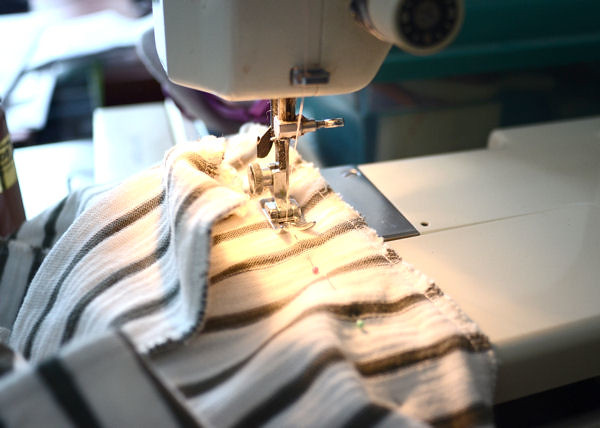
Sew along the pins, removing as you go. Try on the shirt to make sure you like the fit. 


How to Resize a Shirt
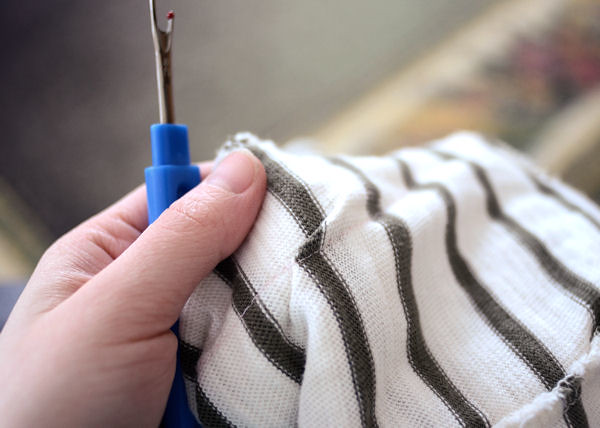
Don't worry if you make a mistake - your seam ripper is your friend! Simply pick out the stitches around the mistake, rearrange the fabric so it lays flat, and sew up the hole, making sure to sew back and forth a couple times and the beginning and end to makes sure it doesn't come undone.

If you're really particular you can iron your seam open, but I'm too lazy for that. I pull out my iron maybe once or twice a year.


How to Resize a Shirt
If everything is good to go, sew another line close to the one you already sewed, this time on the outer edge. If you have a serger you don't need to do this, but I like to sew another line to keep the edges from fraying.

Cut the excess fabric close to the sewing line.


How to Resize a Shirt

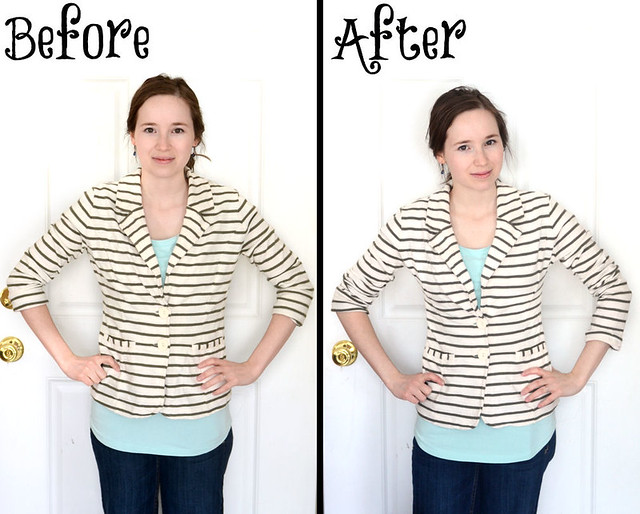
And there you have it: a nicely fitting jacket.


How to Resize a Shirt
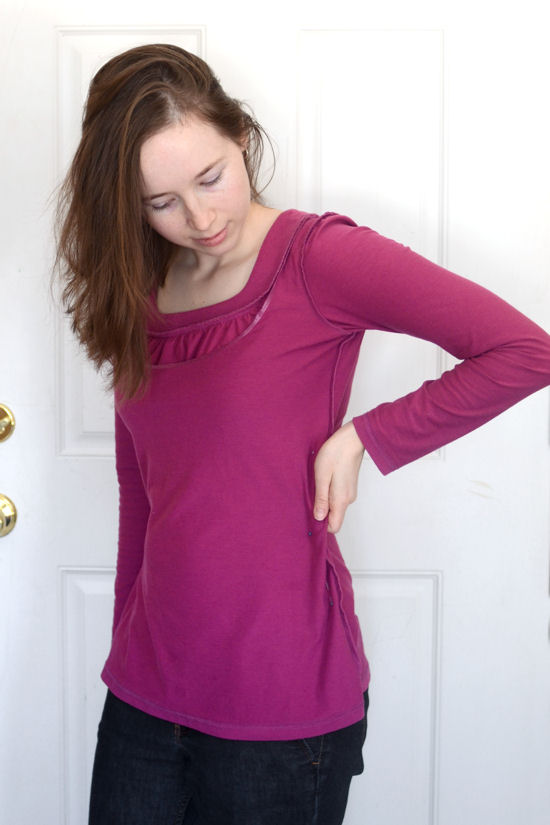
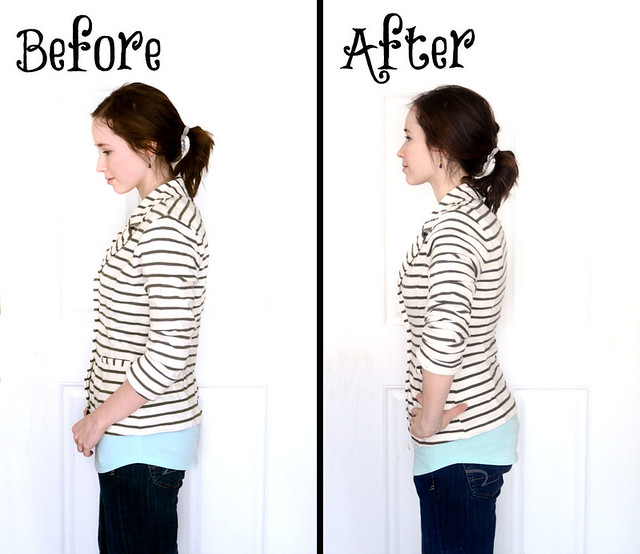
I also used this method to resize a nursing shirt.


How to Resize a Shirt

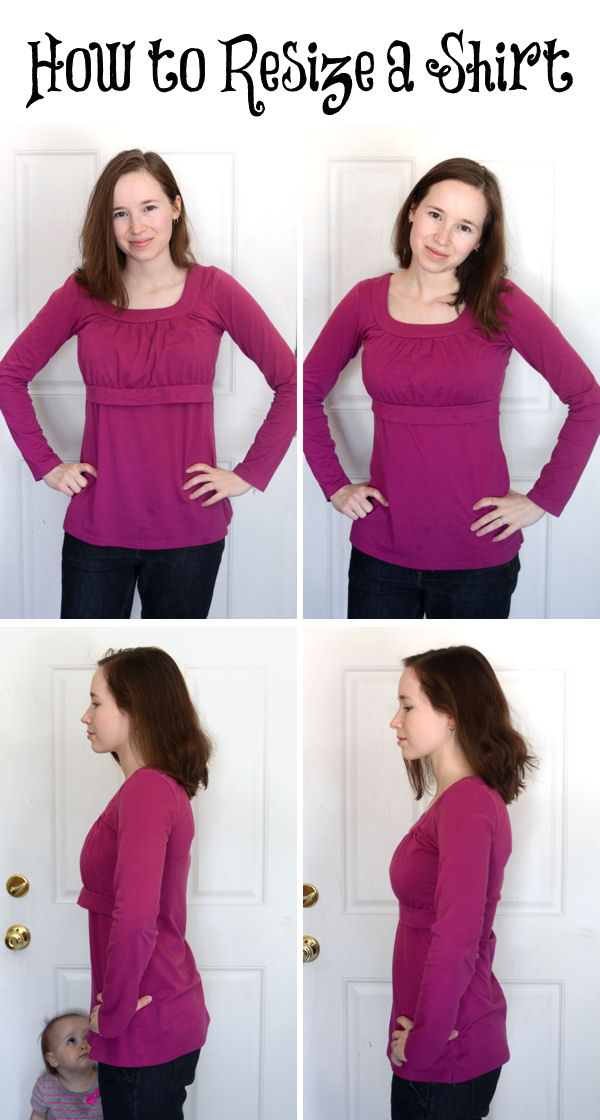
Here's the before and after. Helen decided to photobomb my before picture.


And that's all!

Make sure to send me pictures if you use my method to resize your shirt.
And leave me a comment if you have any questions.

xoxo
Erica


How to Resize a Shirt


Note: Links are affiliate.

Fishtail Braid & Bun Tutorial


Fishtail Braid
Fishtail Bun
Time for another hair tutorial! Learn how to do this messy fishtail bun on yourself.


Watch the video below for instructions.

(If video won’t load, watch on YouTube here)


DIY Fall/Autumn Leaf Garland


040

Time for an autumn tutorial!
033
Here’s what you’ll need to make your own fall leaf garland: a length of yarn, a couple of pins or nails, miniature wooden clothespins and pressed or wax-dipped leaves.
031
  • Measure how far up the wall you’d like to place your garland (I went slightly above eye level), and place a pin or nail in that spot. I used a pin because that leaves the least damage on our sheetrock walls. If you don’t mind poking holes in your walls, you could always use nails or whatever else you’d like.
  • Measure up the same distance where you’d like your garland to end and place the other pin in the wall.
  • Tie one end of the yarn onto one of the pins. Stretch it across to the other pin and tie in place. Make sure to pull the string a bit more taught than you’d like the finished garland to hang since the leaves will weigh it down.
  • Clip your leaves to the yarn with the mini clothespins at even intervals.
  • And you’re finished!
041
I plan to reuse this clothesline for winter/Christmas – maybe hang pine cones and tiny pine branches interspersed with miniature Christmas tree globes.
What are you doing to decorate your house for fall?

8 Responses to DIY Fall/Autumn Leaf Garland

  1. Megan 
    That’s a neat idea!
  2. Kathryn Grace 
    Very fun and easy! Great that you can quickly change out decor by clipping new items to the line.
    By the way… I love the block font you used – could I ask the name of it and if you found it free or bought it?
  3. Erica Lea 
    Kathryn: Yes, I can’t wait to try something else for Christmas. :) Yeah, I really like that font. It’s called “Sketch Block” and I got it for free here: {link}

Braided Bangs Tutorial

 photo 020-3.jpg

Here’s an easy way to spice up your ponytail.


Watch the video for directions…


Easy Elegant Updo or Half Updo Tutorial

 photo 007-6.jpg

Time for another hair tutorial! It’s been a little while, hasn’t it.
Inspired by a photo on Pinterest (which I can no longer find), I decided to recreate this elegant updo.

Watch the video below for the directions:


How to Pin Properly


Okay. I’ll admit it. I’m kinda (sorta, a little bit) addicted to Pinterest. It’s a wonderful way of visually bookmarking pages and ideas.
However, there’s a darker side to Pinterest. Not everyone pins properly, and sometimes it drives me crazy.
Ideally, whenever you click on a pin it should bring you directly to the original source of the photo, article, recipe, etc. I’m not saying that I always pin correctly. But there are a few things I try to avoid.

Here are my tips for better pinning:

1) Pin from the individual post on a blog, not the main page
I see this so many times. You’re scrolling through a blog, and you see a recipe/photo that you really like. You hit the “pin it” button and go merrily on your way. However, when someone clicks on your pin a month or so later, the post is nowhere to be seen on the main page of the blog.
Please click through to the individual post before pinning. It will save everyone a lot of time.

2) Don’t post from your RSS feed reader, Tumblr main page, or an email update
So you’re happily reading updates from blogs you love when you see an awesome post you want to share. You hit the “pin it” button and continue getting caught up on your blogs. When someone sees your awesome pin and wants to read the post, they’re brought to their own RSS reader which doesn’t contain the post they’re looking for. Do everyone a favor and click through to the original post before pinning.
The same applies for the Tumblr main page and email updates.

3) Speaking of Tumblr…
Whenever I see that a pin originated from Tumblr, my heart sinks. I know there are many bloggers who share their work through Tumblr, but there are many, many more that share other people’s work without clearly crediting them. Sometimes it’s so hard for me to find the original source that I give up on a pin. Please, if you’re a Tumblr user, provide a clear link back to the original source. And Pinterest users: don’t pin from a Tumblr blog that doesn’t give proper credit!

4) If you upload a photo, provide a link to the original source
Another thing that causes heart-sinkage: “Uploaded by user.” This means there’s no easy way to find out who the original artist is – you’d have to click on the pin endless times. But there’s hope! It’s very easy to add a link to the photo you upload.
Upload a pin from your computer, then hover over the picture with your mouse and hit the “edit” button.
This will take you to an “Edit Pin” page where you can easily insert a link. Hit save, and you’re done!

5) Don’t pin a photo directly after commenting on a post
If you hit “pin” directly after commenting on a blog post, the pin will take everyone directly to your comment instead of the top of the post. Very annoying.

A Couple More Tips/Tricks:

Google Image Search
If you simply cannot find the original source but really want to share a photo, try using the Google Images search. Right click on the photo you want to share and hit “copy image URL.”
Go to Google Images and hit the little blue camera button on the right side of the search bar.
Simply paste the URL you just copied, hit search, and you’ll be shown different sources of the image. You may have to do a bit of digging to find the original source, but it’s usually quite possible.

Did you Know you can edit your board cover?
Have you noticed how your pin boards have a photo representing the entire board? You can either let Pinterest choose that photo, or you can decide for yourself.
Click on one of your boards and hover over the picture you want to use as your “board cover.” Hit the “Set Board Cover” button.
You’ll be taken to a pop-up that allows you to drag the photo around until it looks just right. Hit “Set Cover” and you’re done.

So there you have my tips for better pinning.
Do you have any tricks/etiquette to share?
Hope ya’ll found this helpful!
xoxo
Erica Lea

6 Responses to How to Pin Properly

  1. Juliana 
    I am still New to the Pinterest world. Thanks for the tips Erica!
  2. Julianne Reiser 
    Great tips!
    My one quibble with Pinterest is the inability to “talk” to fellow pinners. For example, someone repinned one of my posts and added a question in the comments. There doesn’t seem to be a way for me to answer the question without simple commenting on her pin. That might be fine if I only needed a line or two, but I’m looking for a dialogue with pinners, not just a line here or there.
    Cheers!
    J.
  3. Melanie 
    Totally violated one of these when I pinned your bread post from my RSS feed reader a while back..oops. I DID fix it the next day but not before a few re-pins occurred. So sorry!!! These are great tips, Erica.
  4. jill 
    whoa!….all I want to do is find great recipes, craft ideas, knitting patterns etc and put them in a spot where I can find them all. Not intending to hurt anyone or break any rules, drive anybody crazy or sink any hearts. I’m sure I broke all the rules, unintentionally.
  5. Erica Lea 
    Melanie: Aw, that’s okay! Thanks for sharing my recipe. :)
  6. Erica Lea 
    jill: I know what you mean! That’s how I felt when I started using Pinterest – I didn’t even think about it as sharing other people’s work! I’m sure I broke most of these rules as well. :) I hope Pinterest starts implementing private boards…that would be really nice. :)

How to Improve Your Portrait Photography with a Point-and-Shoot

I read once that Ansel Adams could probably take better photos with a camera phone than most of us could with an expensive camera.
You may think because the only camera you can afford is a point-and-shoot that you can never take professional-looking portraits. Wrong! With a little knowledge & practice you can make your camera perform. Here are a few tips.
p021
#1: Turn Off Your Flash!
Instead of relying on your flash to provide adequate light, move closer to a window. The lighting is much more natural and soft. Most point-and-shoot cameras should have an option to turn the flash completely off.
Probably the best thing you can do to improve your photography is to ensure that you have great lighting. Even with a very expensive camera, it can be quite hard to get a good shot in horrible lighting. Experiment with different light sources. Natural light from a window is usually the most flattering, as is the light outside just after sunrise and just before sunset.


#2: Be Aware of Your Focal Length
Did you know your focal length changes the appearance of your photos? At the wide end (zoomed all the way out) your photos are distorted; zoomed in, they’re compressed.
Say you want to take a closely cropped portrait. Instead of just moving in close, back off a ways and zoom in. Notice how distorted John’s face is in the first photo. His nose is disproportionately large. This is fine if you’re going for the wide-angle look, but it’s not the most flattering composition. Now notice how much more even the second photo is and how the background is blurred. All I had to do was back up and zoom in. That simple.


#3: Shoot at Eye Level or Slightly Above
This is the most flattering position, especially for models that are overweight. Also, have your model tilt their chin up slightly. This will ensure that you get no double chins!


mugno
#4: Shoot at an Angle
Instead of just shooting your model strait on (the mug shot), angle yourself so that the face and body are 3/4 in view. This is much more flattering.


story-no
story
#5: Decide Whether to Crop Close or Tell a Story
There is no right or wrong here. Just make sure that you decide whether or not to tell the story or crop close.


po22
#6: Edit Your Photos
Most photos can be improved with a bit of editing. Adding contrast, fixing color casts, and softening facial imperfections can really boost your photo. Brighten the eyes a bit (if needed) and sharpen. There are many good free photo editing tutorials online, and even some free photo editing software.
Then again, you don’t want to go overboard on the post processing. Heavily altered images just look unrealistic.
And there you have – my six tips for improving your portrait photography with a point-and-shoot.
All photos were taken with a Sony DSC-H3 and edited in Paint Shop Pro Photo.
Do you have any tips for point-and-shoot users?
P.S. Yes, a good camera can really make taking good photos easier, but don’t let your cheap camera stop you from practicing!


3 Responses to How to Improve Your Portrait Photography with a Point-and-Shoot

  1. Gabby 
    Thank you so much for this one! Great post!
    Have a nice weekend! =)
  2. May 13, 2012: Capturing Special Moments | Gifts by Genius: Unique Gifts & Products 
    [...] How to Improve Your Portrait Photography with a Point-and-Shoot [...]
  3. Abigail 
    Thanks! I needed this! :)

Simple Three Strand Braid

I first learned how to braid by making bread. It was so easy to cross the ropes of dough over each other to make French bread. But braiding my own hair was another matter. I would invariably end up frustrated and discouraged. But my sister encouraged me to keep trying, and eventually I succeeded at braiding a (very messy) simple braid.
Here is a tutorial to help you succeed with your first braid.
m
Simple Three Strand Braid Tutorial

1) Begin with neatly combed hair. There are few things more aggravating than snarly hair.
2) Separate your hair into 3 equal strands and hold them apart with your fingers.
3) Cross the far right strand over the middle strand. This is the new center strand, and the center strand is the new far right strand.
4) Cross the far left strand over the center strand. This is the new center strand, and the center strand is the new far left strand.
5) Continue in this manner (alternately crossing the far right and far left strands over the center strands) until you reach the desired length.
6) Tie off the braid with a ponytail holder, small rubber hair bands, ribbons, or whatever you wish.
This skill is the basis for many different hair styles.   Experiment by making two equal-sized braids,  making two small braids on either side of your head and gathering them together at the center of your head, coiling the braid into a bun, etc. Be creative!
f
© 2009 by Erica Lea


2 Responses to Simple Three Strand Braid

  1. Simply Vintagegirl 
    What a lovely tutorial! The photographs are charming and the hair looks so soft and silky! I have inherited a bit of wildness to my hair (it is curly, but without gel it will be twice the size of my head by the end of the day). :) Once my hair is longer, I will be able to try (again) to do my own braid (when my hair was longer I tried, but it was never satisfactory). This morning I had my dear mother French braid my hair (it is finally long enough! yay!).
    I’m not quite sure what kind of strawberries we grow. They are small, but delicious. There is the occasional plant that produces misshapen berries, but still taste good.
    Joyfully in Christ,
    Emily Rose
  2. Erica Lea 
    Thank you, Emily!