Showing posts with label Beauty. Show all posts

My Tarte Makeup Collection/Mini Reviews and Swatches


My Tarte Makeup Collection

First off, my apologies for being gone for over a month. I have been trying to grow my cooking blog, and I also posted my first ever sponsored post over there! I also managed to hurt my wrist AGAIN. So what with cooking, visiting the chiropractor, planning Helen's birthday party, taking photos for relatives, visiting with relatives, getting sick, getting the winter blues...I haven't had the energy to post here. But I hope to do better in the coming months!

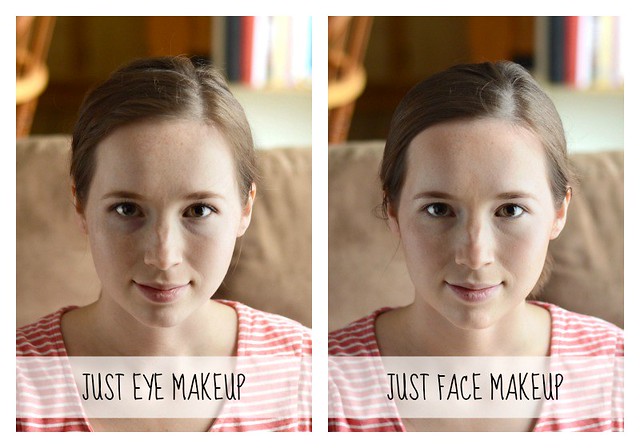
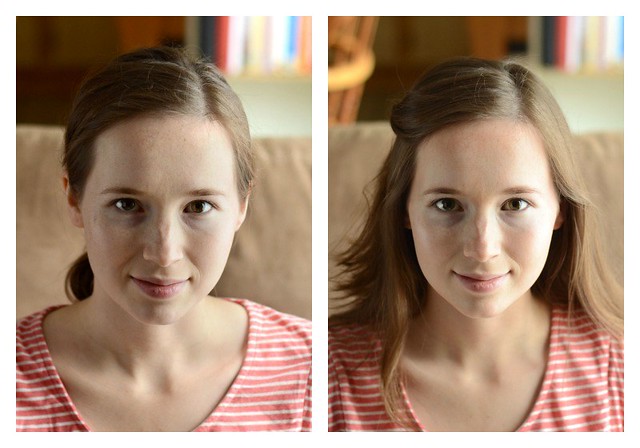
On a related note, I've been considering what direction I want to take Simple Days. My interests have expanded in the fashion/beauty world, and I'd really like to share about it more regularly. It would be in the realm of outfits of the day, makeup tutorials/reviews, and hair tutorials. I would, of course, still include posts about our everyday life. Thoughts? Sound off in the comments about what posts you most like to see here.


BUT ABOUT MY TARTE COLLECTION:

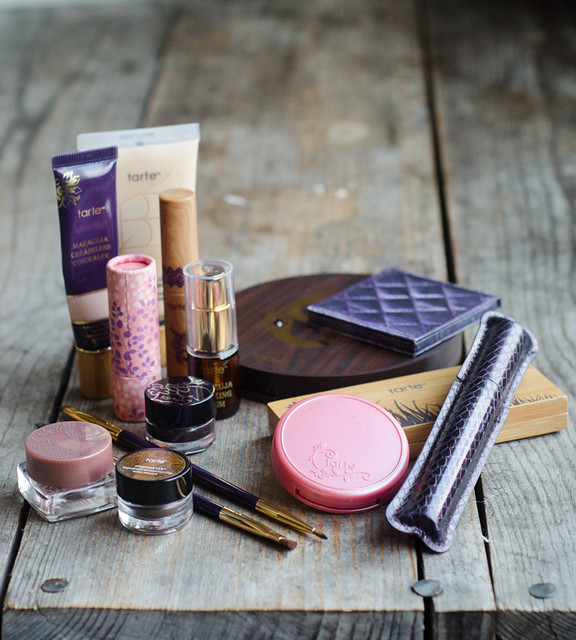
Over the past 2-3 years, I have collected various Tarte makeup products. Nearly all of the items were either on sale or gifts. You see, Tarte is a high-end natural makeup company. Their products are wonderful, but on the pricey side. 

I'll talk you through how I came by each item and give a little review:


My Tarte Makeup Collection

BRUSHES:

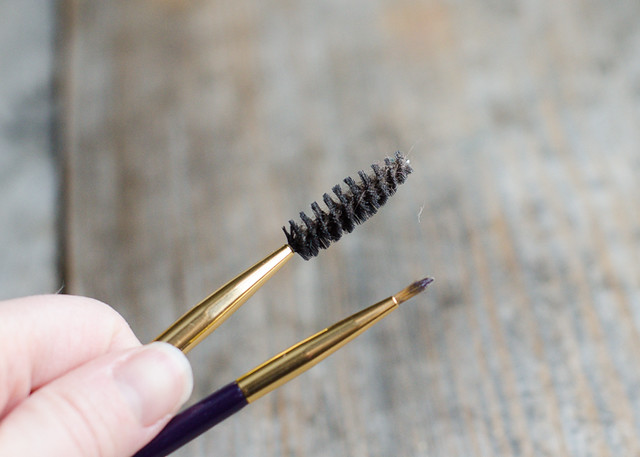
A few years ago I purchased a couple of Tarte kits from HauteLook for Christmas presents for my and Reuben's sisters. I didn't think they would be interested in these brushes, so I kept them (Muahaha). They are double ended. 

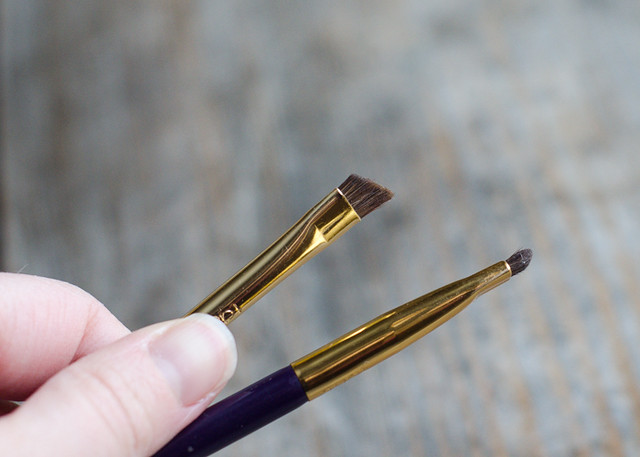
I LOVE the angled/spoolie brush (similar HERE). It's perfect for doing my eyebrows. At first I thought the bristles were too hard on the angled end, but it's just right for applying the brow mousse (see next photo).

The smudge/liner brush is fine, but it isn't stellar. I wouldn't pay big bucks for it.
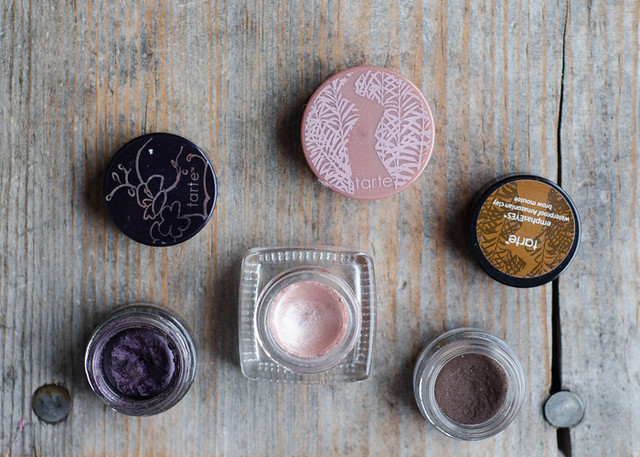
My Tarte Makeup Collection

CREAM PRODUCTS

The plum eyeliner and brow mousse came in the same sets from Haute Look. I purchased the pink cream eyeshadow from the Tarte website when they were having a huge sale + free shipping. 

The gel eyeliner (shade "Blackened Plum") is a lovely color and it doesn't smudge easily. I don't get a large amount of use out of it simply because I prefer a brown liner on a day-to-day basis.

The pink cream eyshadow is one of my favorite makeup products of all time. It's a lovely, flattering, rosy, shimmery shade. It's not too pink so as to make your eyes look tired and red. I'm so bummed that the color is no longer available. I'll probably cry when I run out.

The brow mousse is da' bomb! I have it in the shade medium brown. It's not too red/orange. It looks very natural and matches my brows quite well. And I think it even helps to keep my hairs in place!


My Tarte Makeup Collection

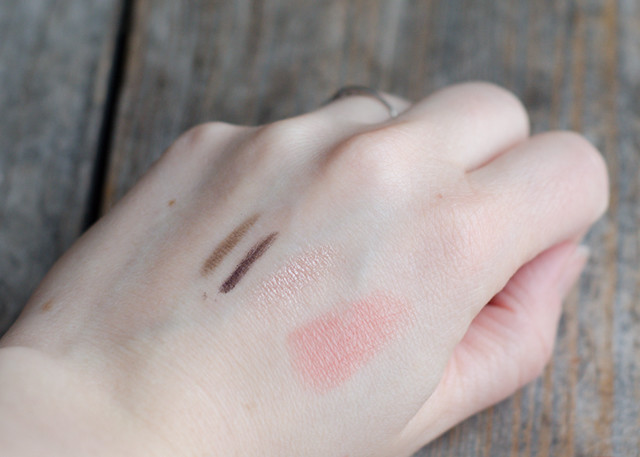
Here are the swatches of the cream products: [left to right] brow mousse, eyeliner, and eyeshadow.
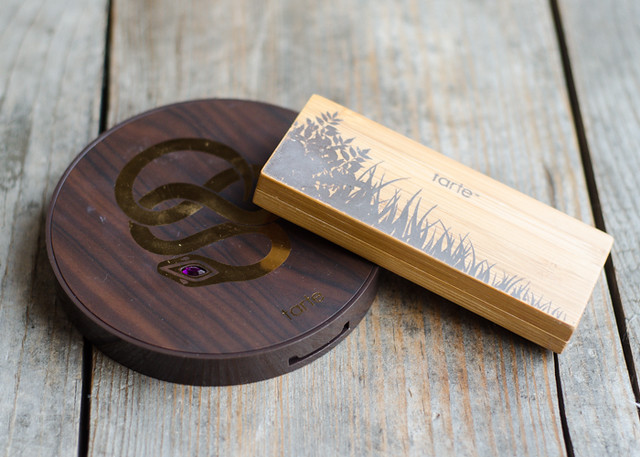

My Tarte Makeup Collection

PALETTES

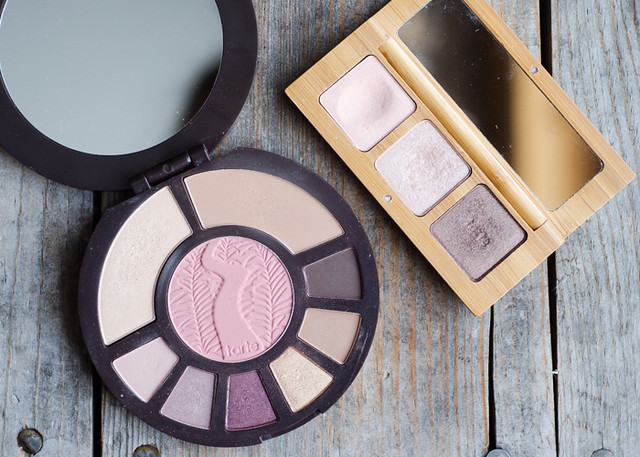
I own two Tarte palettes. The larger face and eye palette (the Rainforest After Dark Palette) was a Christmas gift from my sister this year. The smaller eyeshadow palette was purchased at the same time I got the kits from HauteLook - I don't think it's available anymore.


My Tarte Makeup Collection

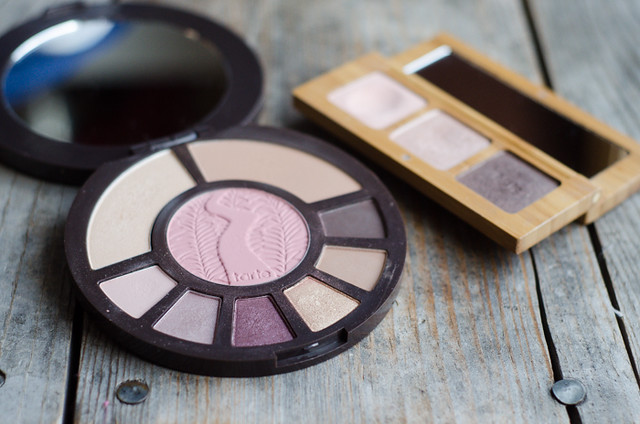
I love both of these palettes. The Rainforest After Dark Palette has everything I need for eyeshadow, blush, bronzer and highlighter. It's an awesome travel palette. The bronzer isn't too orange and it blends nicely. The blush is a lovely, natural rosy color. The highlighter gives you a nice glow without being glittery. All of the eyeshadows are soft and blend nicely. I am so pleased with the entire palette.


My Tarte Makeup Collection

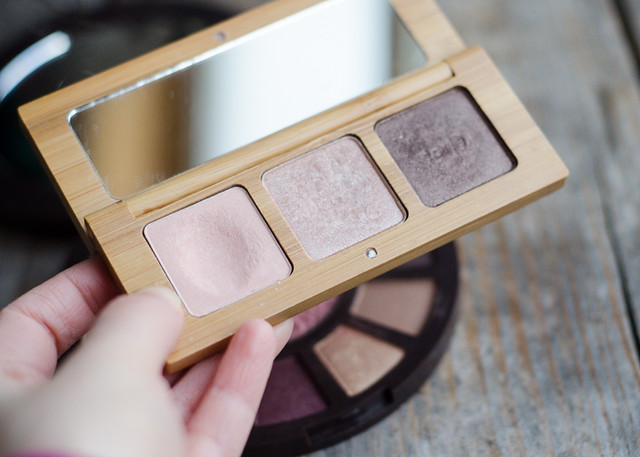
This is a nice little palette as well. You could really get by with just these three shades for everyday eye looks. I use the light peach shade to set my undereye concealer as well. I actually hit pan a few days after I took this photo. I think it's the first makeup product I've ever hit pan on.
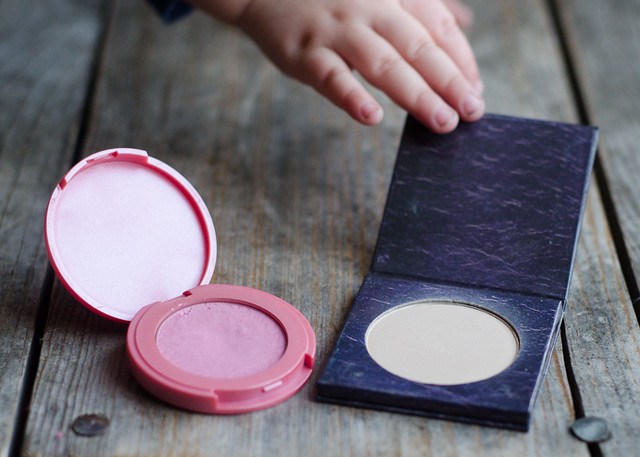
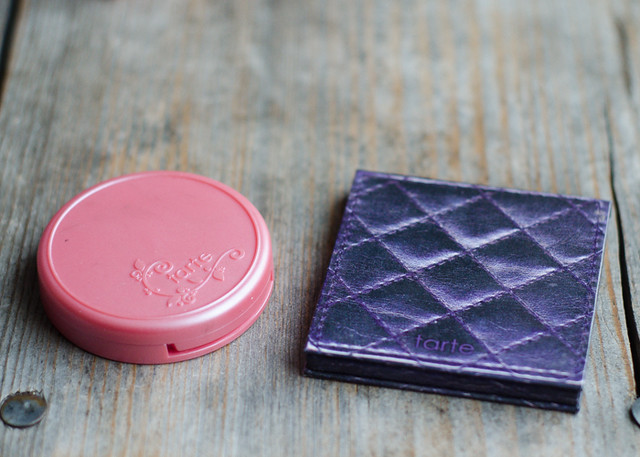

My Tarte Makeup Collection

POWDERS

For individual powders, I have the travel size of the Amazonian Clay Blush in Dollface and a sample size of the pressed mineral powder (exact product no longer available). 

The blush I bought on ebay for $10. It has lasted quite a while. I like the shade, but it tends to accentuate the redness on my cheeks. It's really pigmented, so I have to use a light hand when applying. 

The setting powder is nice, nothing stellar. I prefer the eyeshadow shown above for setting my undereye area.
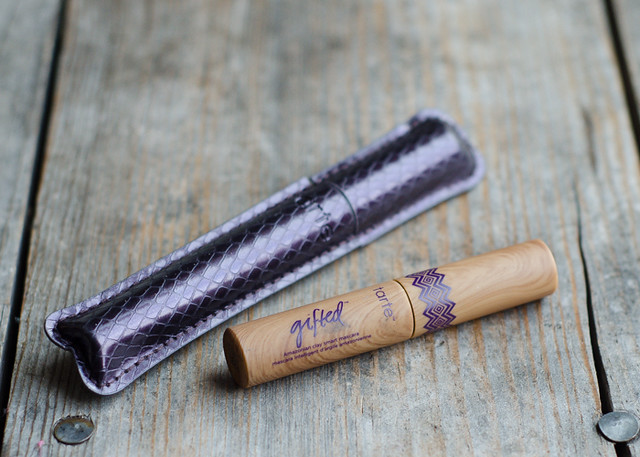

My Tarte Makeup Collection


MASCARA

I have the full-size Lights, Camera, Lashes mascara and a travel size of the Gifted mascara. The LCL mascara was a Christmas gift, and the Gifted mascara was a free sample with purchase.


I really like how the LCL mascara makes my lashes look - bold without looking fake. It does flake a bit on me. And this tube is expired, so I'll have to let it go. *sniff sniff*

The Gifted mascara is very nice. It's quite natural and separates my lashes. I does tend to smudge a bit, but nothing major.

I want to get my hands on Tarte's waterproof mascara next...


My Tarte Makeup Collection

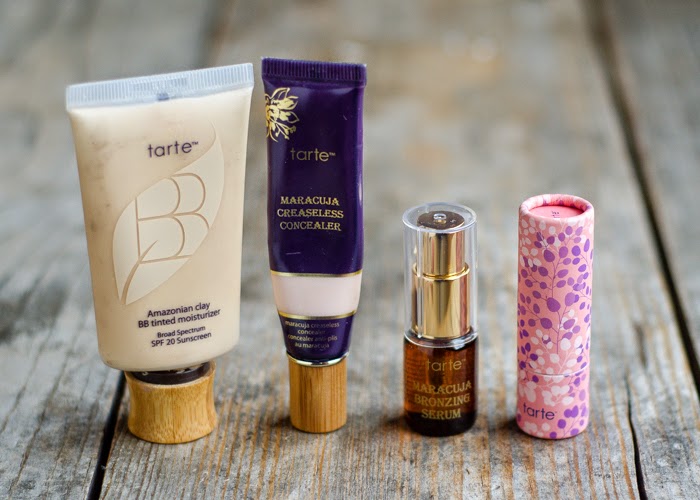
FACE AND LIP PRODUCTS

When Tarte was having a sale on HauteLook, I snagged the Amazonian Clay BB Tinted Moisturizer (in shade fair, now called ivory). I was a bit iffy about this product when I first tried it. It didn't seem to give me any coverage at all and didn't sit well on my skin. After trying different methods of applying it, I now really enjoy it. I find it works best to use my fingers or a sponge. It is perhaps a bit warm and dark for my winter skin, but only slightly.

The Maracuja Creaseless Concealer (shade fair, a Christmas gift) is simply amazing. I love it for under my eyes or on blemishes. This one took a while for me to fall in love with as well. I find that patting it onto my dark circles with my finger works best. And I like to set it. Let's face it - if you have creasey eyes, concealer is just going to crease. 

The Maracuja Bronzing Serum (travel size) was a Christmas gift as well. I have yet to try this out since I want to be tanning the rest of my body while I use it.

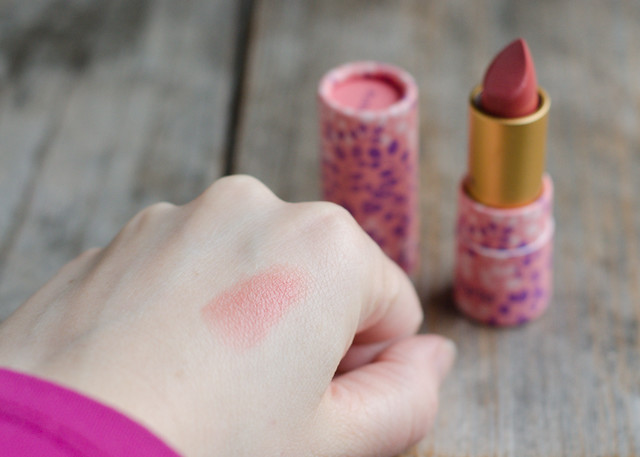
Last (and certainly not least) I have the Tarte Butter Lipstick in Angelic Nude. It is such a lovely, light color (see swatch below). This will be wonderful for spring and summer. It's also handy to lighten up a lipstick that's a bit too dark. It has a nice minty smell. And the packaging is just adorable. 


Amazonian Butter Lipstick in Angelic Nude

Anyhow, now you know how obsessed interested I am in makeup.

What are your favorite (can't-live-without) makeup/beauty products?

NOTE: Some links are affiliate. All words and opinions are my own.

Face Makeup vs. Eye Makeup


First of all, let me talk about my philosophy about makeup:


I like, for the most part, for my makeup to enhance my natural features instead of distracting from them. It's fun to play with more intense makeup sometimes, but I think subtle is the way to go for every day. 

Makeup, to me, is kind of like doing your hair. Most days I'm content to just comb it and put it in a braid, ponytail, or quick updo. But sometimes it's fun to put in a bit more effort and curl it. It's not necessary, but it's fun and makes you look extra put together.

Also, if you're getting your picture taken, it sometimes helps to go a bit heavier with your makeup since in doesn't show up as well on camera. In the example photos below I put on more makeup than I typically wear just so y'all could see it. :)

Anyway.

I was curious about which type of makeup makes a bigger difference: eye makeup (liner, eyeshadow, and mascara) or face makeup (foundation, concealer, blush, bronzer, etc.). So I decided to take some photos and share them with you and get your opinion!

These photos have only been edited for exposure and white balance.


No Makeup VS Just Eye Makeup
Here I am with no makeup vs. just eye makeup. I filled in my brows, added a bit of light brown eyeshadow for contouring, some eyeliner and mascara. I think it really helps to draw attention to my eyes. But those dark circles...


No Makeup VS Face Makeup
Here is am with no makeup vs. just face makeup. I like how my skin tone is evened out, I have a bit of color on my cheeks, and my dark circles are softened. 


Eye VS Face Makeup
And here's a comparison of just the eye makeup and just the face makeup. It's a tough call for me. I really like the way my eyes are enhanced with the eye makeup, but my skin looks much more even with face makeup. What do you guys think?


PicMonkey Collage
As a side note, I think that hair is almost (if not more) important to your overall look than makeup. Here I am with no makeup and my hair scraped back into a ponytail vs no makeup and my hair softly pulled back. I think it makes quite a difference.


Hair and All Makeup

And here I am with both eye and face makeup. This is more makeup than I like to wear on a day-to-day basis. If I could only do THREE things with makeup, I would fill in my brows, add a touch of eyeliner, and conceal my dark circles. Everything else is just icing on the cake.


How about you? 

How do you like to do your makeup? If you could only do 3 things with makeup, what would they be? Which do you prefer: eye or face makeup?


I'm Going to Chop It!


Cut it or Keep It

You guys decided, by a land slide, that I'm going to chop off my hair!

I'm excited because I've decided to get it cut at a salon, and I have NEVER had my hair professionally cut.

The look I'm going for is collarbone length with soft layers. I'm still on the fence about whether or not I should try bangs again...


Here are some of the inspiration photos I want to show my stylist (whoever it may be):

Image from Box No. 216

This is very pretty. I wish I was brave enough to try a bit of ombre. Maybe I'll have to give lemon juice a whirl this summer.


Edgy and sexy hair cut this winter is the collar bone length hair cute with a heavy side bang.  #sexyedgyhair #winterlook2013
Image from Alex Crabtree

I really like this one as well. I know my hair wouldn't be this fluffy unless I curled it, but it shows me the potential. :)


Now I just need to find someone willing to watch Helen (I may just go after she's in bed some night) and set up an appointment.


Thank you all for helping me decide!
xoxo
Erica


Cut It or Keep It? YOU Decide!

Cut It or Keep It
I have been thinking about getting my hair cut for quite some time. The last time I had an appreciable amount lopped off was a couple of summers ago. The ends are getting split, so I'm definitely due for a trim. 

Here's my dilemma: My hair is at a length right now that is very easy to braid and put into a bun. However, my head starts to hurt if my hair is in a bun for very long. Also, I never curl my hair anymore because there's no point: the curls just fall out of my heavy hair.

So, I've decided to let YOU, dear readers, decide for me!

I would get my hair cut to about the length in the photo to the left - maybe a little longer (I would be going for collarbone length). Right now my hair is almost as long as it is in the photo on the right (maybe a bit shorter). BTW, that photo was taken when I was 17. Woot.

So, just leave a comment saying, "Cut it!" or "Keep it!" You can give me your reasons for chopping it or letting it stick around if you like.

I'll tally up the answers next Tuesday and let you know the results!

My fate is in your hands.

xoxo
Erica

Simple Three Strand Braid

I first learned how to braid by making bread. It was so easy to cross the ropes of dough over each other to make French bread. But braiding my own hair was another matter. I would invariably end up frustrated and discouraged. But my sister encouraged me to keep trying, and eventually I succeeded at braiding a (very messy) simple braid.
Here is a tutorial to help you succeed with your first braid.
m
Simple Three Strand Braid Tutorial

1) Begin with neatly combed hair. There are few things more aggravating than snarly hair.
2) Separate your hair into 3 equal strands and hold them apart with your fingers.
3) Cross the far right strand over the middle strand. This is the new center strand, and the center strand is the new far right strand.
4) Cross the far left strand over the center strand. This is the new center strand, and the center strand is the new far left strand.
5) Continue in this manner (alternately crossing the far right and far left strands over the center strands) until you reach the desired length.
6) Tie off the braid with a ponytail holder, small rubber hair bands, ribbons, or whatever you wish.
This skill is the basis for many different hair styles.   Experiment by making two equal-sized braids,  making two small braids on either side of your head and gathering them together at the center of your head, coiling the braid into a bun, etc. Be creative!
f
© 2009 by Erica Lea


2 Responses to Simple Three Strand Braid

  1. Simply Vintagegirl 
    What a lovely tutorial! The photographs are charming and the hair looks so soft and silky! I have inherited a bit of wildness to my hair (it is curly, but without gel it will be twice the size of my head by the end of the day). :) Once my hair is longer, I will be able to try (again) to do my own braid (when my hair was longer I tried, but it was never satisfactory). This morning I had my dear mother French braid my hair (it is finally long enough! yay!).
    I’m not quite sure what kind of strawberries we grow. They are small, but delicious. There is the occasional plant that produces misshapen berries, but still taste good.
    Joyfully in Christ,
    Emily Rose
  2. Erica Lea 
    Thank you, Emily!